
Why Is My Window AC Leaking Water? Causes & Fixes
A window air conditioner drips because it pulls moisture out of the air as it cools your room, and that moisture has to go somewhere. Most of the time, water dripping outside your window is completely normal. The problem starts when that water shows up inside your house, pools on your windowsill, or drips down your interior wall instead of draining outdoors.
This guide walks through every reason a window AC leaks, how to tell the difference between a normal drip and an actual malfunction, and the exact steps to fix each cause yourself before you call a repair company.
Is Water Dripping From My Window AC Normal?
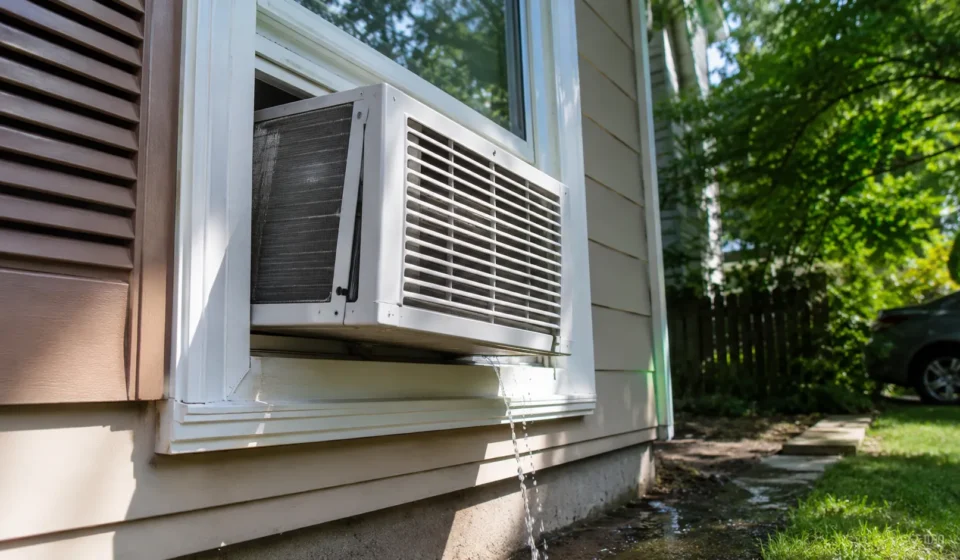
Yes, in most cases. A window air conditioner condenses humidity out of the air on its cold evaporator coil, and that water collects in a pan at the bottom of the unit. Manufacturers design the unit to tip slightly toward the outside, so gravity carries that water out through a drain hole or off the back edge of the case.
On a humid summer day, it is normal to see a steady drip, sometimes even a small stream, forming a puddle under the outdoor side of the unit. This is the AC doing exactly what it should. The only time this becomes a real concern is if the water is landing somewhere that causes damage, such as a walkway that ices over in cold weather or a neighbor’s window below yours.
Water leaking indoors, however, is never normal. If you see moisture on your windowsill, dripping down the wall, or pooling on the floor under the unit, something is preventing the condensate from draining outward the way it is supposed to.
Common Causes of a Window AC Leaking Water Indoors
1. The Unit Is Not Tilted Correctly
This is the single most common cause of indoor leaks. Window AC units need a slight backward tilt, typically about a quarter inch to half an inch lower on the outside edge than the inside edge. This tilt uses gravity to send condensate to the drain area at the back of the unit instead of letting it pool and spill toward your room.
If the unit was installed level, or worse, tilted slightly toward the inside of the room, water will collect on the indoor side of the drain pan and eventually overflow onto your windowsill.
2. A Clogged or Blocked Drain Hole
Most window AC units have a small drain hole, or sometimes a rubber drain plug, on the underside of the back panel. Dust, mineral buildup from hard water, insect debris, and mold can all clog this opening over time. When the drain hole is blocked, water backs up inside the unit instead of exiting, and it eventually finds the path of least resistance, which is usually back into your room.
3. A Dirty or Clogged Air Filter
A dirty filter restricts airflow across the evaporator coil. Reduced airflow means the coil gets colder than it should, and in many units this causes ice to form directly on the coil surface instead of condensation dripping normally into the pan. When you later turn the unit off, or when the ice melts faster than the drain can handle, you get a sudden rush of water that overwhelms the pan and leaks inside.

4. Frozen Evaporator Coils
Ice buildup on the coils is not a cause on its own, it is usually a symptom of another problem: a dirty filter, low airflow, blocked vents, running the unit on a very cool night when outdoor temperatures drop below what the thermostat calls for, or low refrigerant. Regardless of the trigger, once ice covers the coil, the unit cannot drain condensate normally. When that ice melts, especially all at once, it produces far more water than the drain pan and hole were designed to handle in a short period.
5. Low Refrigerant
Low refrigerant makes the evaporator coil run colder than normal, which speeds up ice formation on the coil. This is one of the few causes on this list that a homeowner typically cannot fix without a licensed HVAC technician, since refrigerant work requires certification and specialized equipment under EPA regulations.
6. A Cracked or Damaged Drain Pan
The plastic pan that collects condensate inside the unit can crack with age, especially in units that are more than seven or eight years old. Once the pan is cracked, water leaks through the base of the unit rather than following the intended drain path, no matter how well the unit is tilted.
7. Improper Installation or a Loose Fit in the Window
If the window AC was not installed with a tight seal, or if the side panels and window sash are not properly sealed, rain and outdoor humidity can enter around the edges of the unit and get mistaken for a leak. Gaps around the frame also let warm, humid outdoor air reach the cold interior components, which increases condensation buildup faster than the drain system can manage.
8. Very High Humidity or Heavy Rain
During periods of extreme humidity or heavy rainfall, a window AC has to remove more moisture from the air than usual, and rain can also blow directly into the case through the exterior grille. Even a properly installed, well-maintained unit can leak slightly indoors during unusually wet weather if the drain path becomes temporarily overwhelmed.
How to Fix a Leaking Window AC Step by Step
Step 1: Check and Correct the Tilt
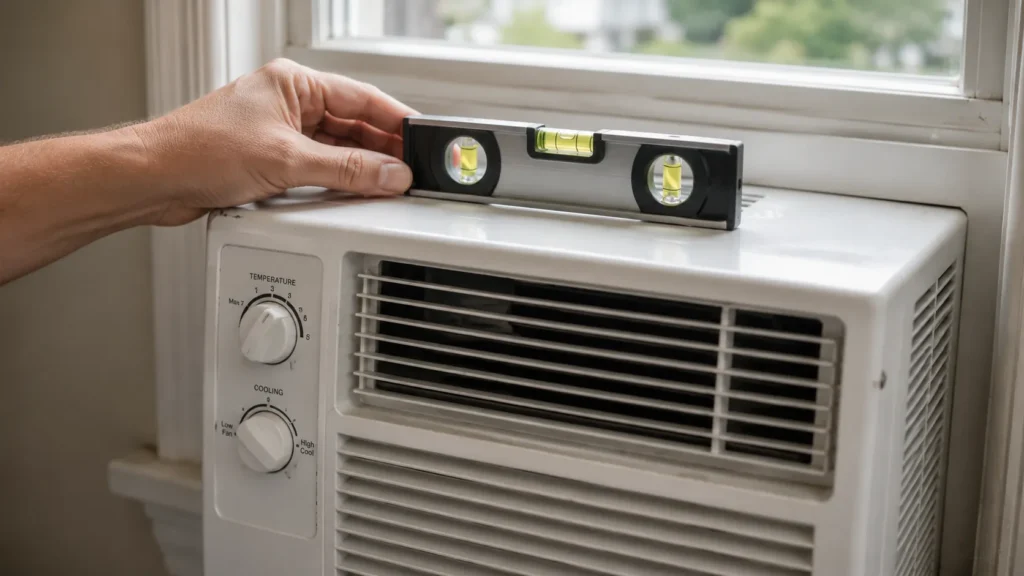
Turn off the unit and unplug it. Use a level placed on top of the unit, front to back. The outside edge should sit slightly lower than the inside edge, roughly a quarter to a half inch of drop. If it is level or tilted the wrong way, adjust the mounting brackets or add a shim under the inside edge of the unit until the tilt is correct.
Step 2: Locate and Clear the Drain Hole
Consult your owner’s manual, or check the underside of the rear panel, for the drain hole or drain plug location. Use a straightened paperclip, a thin wire, or a pipe cleaner to gently clear any debris or mineral buildup from the opening. Flush it with a small amount of warm water to confirm it drains freely.
Step 3: Clean or Replace the Air Filter
Remove the front filter, which usually slides out without tools. Vacuum it or rinse it under running water if it is a washable type, and let it dry completely before reinstalling. Most manufacturers recommend cleaning the filter every two weeks during heavy use season, and replacing disposable filters roughly every one to three months.
Step 4: Let Frozen Coils Thaw Completely
If you can see ice on the coils through the front grille, turn the unit off and switch the fan to “fan only” mode, or unplug it entirely, for at least three to four hours. Do not chip at the ice, since this can puncture the coils. Once fully thawed, check that airflow is not blocked by furniture, curtains, or a dirty filter before running the compressor again.
Step 5: Inspect the Drain Pan for Cracks
With the unit unplugged and, ideally, removed from the window, look at the base of the internal pan for visible cracks or gaps. A cracked pan generally cannot be repaired reliably at home and typically means the unit needs professional service or replacement, particularly on older units.
Step 6: Seal Gaps Around the Installation
Check the foam or vinyl side panels for gaps and reseat them snugly against the window sash. Add weatherstripping or foam insulation tape around any remaining gaps between the unit and the window frame to block outdoor air and rain from entering.
Step 7: Call a Professional for Refrigerant or Compressor Issues
If you have corrected the tilt, cleared the drain, cleaned the filter, and the coils still freeze repeatedly, the unit likely has a refrigerant leak or a failing compressor. This requires a licensed HVAC technician, since handling refrigerant without EPA certification is illegal in the United States.
Leaking From the Front vs the Back: What It Tells You
Water at the back of the unit, dripping outside, is normal operation. Water at the front of the unit, on your windowsill or floor inside the room, points to a tilt problem, a clogged drain, or a cracked pan. Water dripping from the bottom seam between the unit and the window sash usually means a sealing or installation gap rather than an internal drain issue. Identifying exactly where the water first appears narrows down the cause before you start troubleshooting.
When to Call a Repair Technician
Call a professional if ice keeps returning after a full thaw and cleaning, if you hear hissing, bubbling, or unusual noises from the compressor, if the unit is more than eight to ten years old and leaking from a cracked internal pan, or if you smell a chemical or sweet odor near the unit, which can indicate a refrigerant leak. These situations go beyond routine maintenance and often cost more to ignore than to repair early.
How to Prevent Window AC Leaks Going Forward
Clean the filter every two weeks during the cooling season, and check the tilt once a month, since window units can shift slightly from vibration or from someone bumping into them. At the start of every summer, before the first hot week arrives, clear the drain hole and inspect the drain pan for cracks or heavy mineral scale.

Keep at least a few inches of clearance around the indoor grille so airflow is never restricted by curtains or furniture. At the end of the season, before storing the unit, let it run in fan-only mode for an hour to dry out the interior, which reduces mold growth and mineral buildup in the drain path.


