How to Repair a Garage Door Opener
A garage door opener rarely fails all at once. It gives warning signs first: a slow response, an odd noise, a light that blinks in a pattern you don’t recognize. Catching those signs early is what separates a five-minute fix from a full motor replacement.
This guide walks through garage door opener troubleshooting by symptom, not by generic checklist. Each section below matches what you’re actually seeing or hearing at the opener, so you can jump straight to the fix that applies to your situation.
Diagnose the Problem Before You Touch Anything
Before you open a panel or reach for a screwdriver, spend two minutes watching and listening. Press the remote and the wall button separately. Note whether the motor makes any sound at all, whether the lights on the unit blink, and whether the door moves partway before stopping.
This matters because a silent opener points to power or a dead remote. A humming opener that doesn’t move the door points to a mechanical jam or a failing capacitor. A door that reverses immediately after closing points to the sensors or the force settings, not the motor. Skipping this step is the main reason people replace parts that were never broken.
Safety Precautions Before Any Garage Door Opener Repair
Garage door openers combine household electricity with a spring-loaded door under real tension. A few precautions keep the repair from turning into an injury.
Unplug the opener at the outlet before removing any cover or touching wiring inside the unit. Keep your hands away from the torsion spring and the cables above the door, since these store enough force to cause serious harm if they release. If the door is stuck partway open or closed, don’t force it, since this can hide a spring or cable failure that has nothing to do with the opener itself. Anyone standing on a ladder to reach the motor should have a second person nearby.
None of the fixes below require disassembling the motor housing or working on springs. If a problem points to either of those, that’s the signal to stop and call a technician.
Garage Door Opener Troubleshooting by Symptom
1: Opener Doesn’t Respond to the Remote or Wall Button
Start with power. Check that the unit is plugged into a working outlet and that the outlet hasn’t tripped a GFCI breaker, which is common in garages. Next, replace the remote batteries even if they seem fine, since weak batteries are the single most common cause of a nonresponsive opener.
If the wall button also fails to trigger the motor, check the low-voltage wire that runs from the button to the unit. Squirrels and rodents chew through this wire more often than most homeowners expect, and a break here looks identical to a dead motor from the outside.
2: Opener Hums or Clicks But the Door Won’t Move
A hum without movement usually means the motor is receiving power but can’t turn the drive mechanism. Pull the manual release cord to disconnect the trolley and try moving the door by hand. If the door is heavy or binds on its own, the opener isn’t your real problem, the door’s balance or springs are.
If the door moves freely by hand but the opener still just hums when reconnected, the capacitor inside the motor housing may be failing. This part wears out with age and is a common cause of a stalled motor on openers older than eight to ten years.
3: Door Reverses Right After Closing
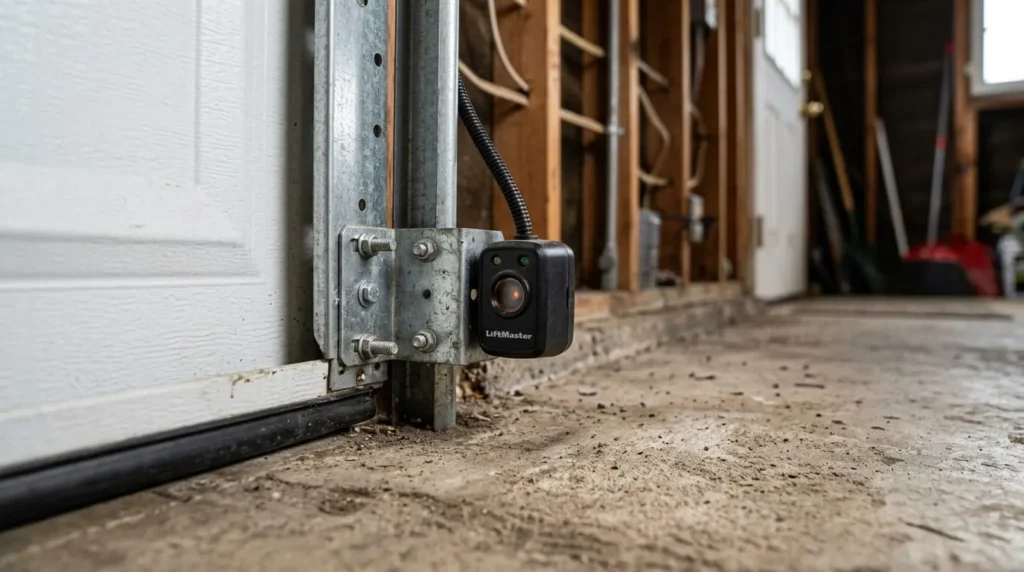
This almost always traces back to the safety sensors, the two small eyes mounted near the bottom of each track. Wipe both lenses clean, then check that they’re pointed directly at each other. A knock from a bike, a lawnmower, or a stray basketball is enough to throw the alignment off by a few degrees, which the system reads as an obstruction.
If the sensors are clean and aligned but the light on one of them still blinks instead of staying solid, try loosening the mounting bracket slightly and adjusting it a fraction of an inch at a time until the light holds steady.
4: Opener Works But Is Unusually Loud
Grinding or rattling during operation is often a lubrication issue rather than a failing part. Apply a garage door lubricant made for the drive type, not household oil or grease, to the chain, screw, or rail as appropriate. Tighten any visible bolts on the motor mount and the rail bracket, since vibration loosens these over years of daily use.
A new, sharp grinding noise that wasn’t there before can indicate a stripped gear inside the housing. This one is worth a professional look, since the internal gear kit is a precise part and reassembly matters for long-term reliability.
5: Blinking Lights or Beeping Codes on the Opener
Most modern openers use a blinking light pattern to report a specific fault instead of failing silently. Count the number of blinks and check them against the code chart in your owner’s manual or on the manufacturer’s support page, since the meaning varies by brand and model.
A steady blink paired with a repeated beep often points to a circuit board issue rather than something mechanical. Replacing the board yourself is possible on some models but requires matching the exact part number, and a mismatched board can cause new problems rather than solving the original one.
How Repair Differs by Drive Type
Chain drive openers are the most repairable at home, since the chain, sprocket, and trolley are all visible and simple to inspect. Loose chains are the main issue, and most units have a tensioning bolt to fix sag without new parts.
Belt drive openers run quieter but the belt itself can’t be tightened the way a chain can. A worn or cracked belt needs full replacement rather than adjustment, so treat visible fraying as a sign to order a new belt now rather than waiting for it to snap.
Screw drive openers rely on a threaded steel rod and need periodic grease made specifically for that mechanism. Standard chain lubricant doesn’t hold up the same way on a screw drive and can leave the trolley sticking.
Direct drive openers have the fewest moving parts and the lowest failure rate, but repairs on the motor head itself are harder for a homeowner to do, since the mechanism is sealed inside a single moving unit.
Adjusting Force and Travel Limits
Every opener has settings that control how far the door travels and how much force the motor applies before it stops or reverses. These sit under a small cover on the motor unit, usually near two small dials or buttons labeled for up and down travel.
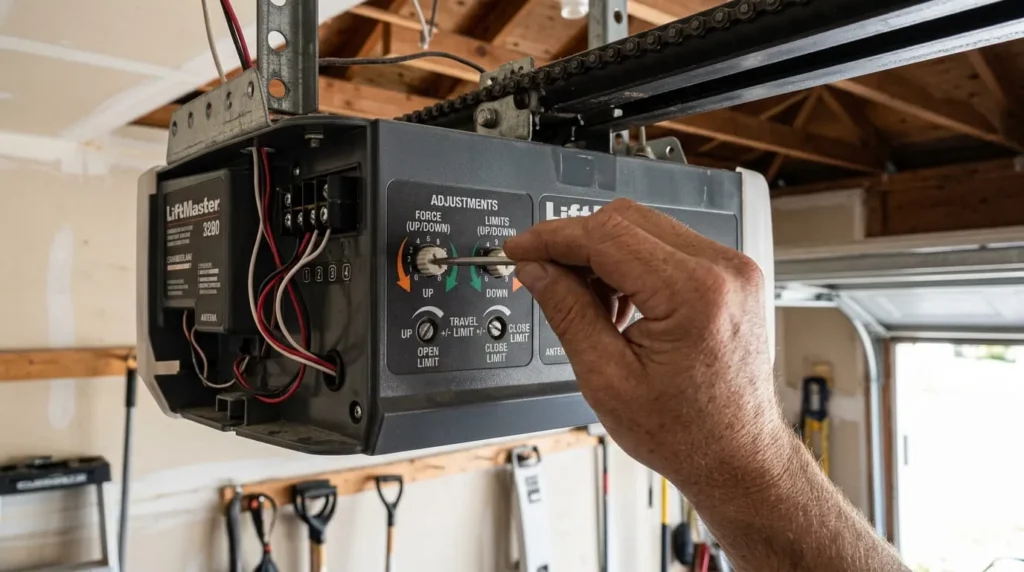
If the door stops short of fully closing, or reverses without any obstruction present, the travel limit may need a small adjustment rather than a part replacement. Make changes in small increments and test after each one, since setting the force too high defeats the safety reversal system that protects people and pets.
When to Stop and Call a Professional
Some repairs go beyond what’s safe or practical to handle without training. Call a technician if the door won’t move even with the opener disconnected, since that points to a spring or cable problem rather than the opener. Call one if you smell burning near the motor, if the unit sparks, or if a circuit board issue keeps returning after a replacement.
Also call a professional if your opener is more than ten years old and lacks modern safety sensors, since older units may not meet current safety standards and parts can be difficult to source.
Repair or Replace: Making the Call
Minor issues like dead batteries, dirty sensors, loose chains, and worn lubrication are almost always worth repairing. These fixes cost little and restore full function in under an hour in most cases.
Replacement becomes the better option once repairs start repeating within the same year, once the motor itself has failed, or once the cost of a new circuit board approaches what a new opener costs. A motor that’s original to a house built more than a decade ago has likely reached the point where a new opener offers better reliability than another repair.
Keeping Your Opener Running After the Repair
Once the immediate problem is fixed, a short seasonal check prevents most repeat visits. Test the auto-reverse function twice a year by placing a block of wood in the door’s path and confirming it reverses on contact. Lubricate moving parts twice a year, tighten visible hardware, and keep the sensor lenses clean.
A garage door opener that gets this kind of attention typically lasts well past its expected lifespan, which means fewer surprises and fewer repairs down the road.