
How to Get Rid of Chipmunk Holes in Your Yard for Good
Filling a chipmunk hole with dirt feels like progress, until a new one shows up three feet away the next morning. That happens because a single hole is rarely the whole story. Chipmunks build connected tunnel systems, so patching the visible opening does nothing about the burrow underneath it. Getting rid of chipmunk holes for good means dealing with the animal, the tunnel, and the reason chipmunks chose that spot in the first place.
This guide walks through each stage in order: identifying what you’re actually looking at, addressing the chipmunks living in the burrow, filling the holes properly, and blocking the area so new tunnels don’t take their place.
Why Chipmunk Holes Keep Showing Up in the Same Areas
Chipmunks dig two kinds of tunnels. Summer burrows sit close to the surface and are used for quick escapes and food storage during the warmer months. Winter burrows go much deeper, sometimes extending twenty to thirty feet, with separate chambers for sleeping, food storage, and waste. A single chipmunk can maintain several connected entrances to the same tunnel system.
That’s why filling one hole rarely stops the problem. The chipmunk simply uses a different entrance, or reopens the one you just filled from underneath. If holes keep appearing along the same fence line, foundation wall, or woodpile, you’re likely looking at one active tunnel network with multiple openings, not several unrelated chipmunks.
Chipmunk Holes vs. Other Yard Holes
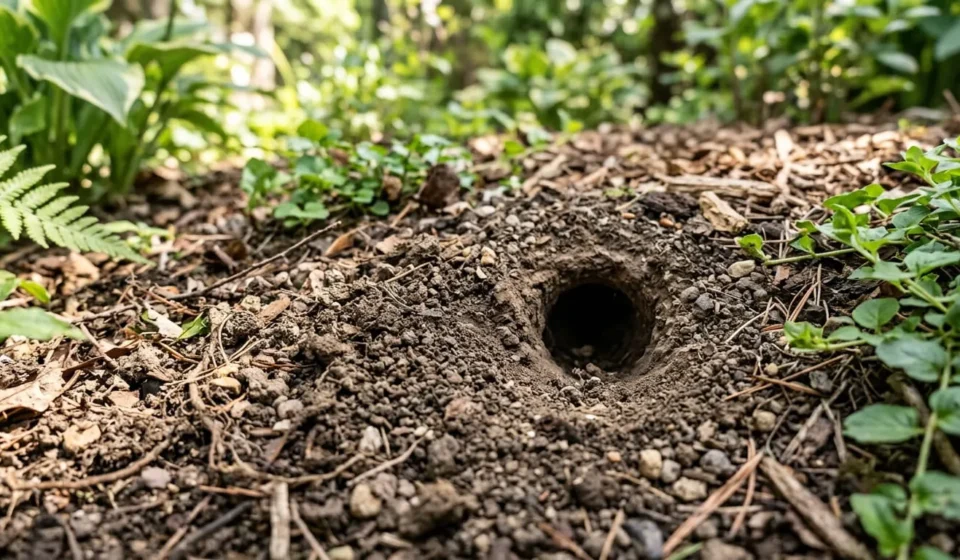
Before doing anything else, confirm you’re dealing with a chipmunk. Chipmunk holes are typically two to three inches across, perfectly round, and have no mound of dirt piled around the entrance. That last detail matters. Moles and gophers push soil up as they dig, leaving a raised mound or ridge. Chipmunks carry excavated dirt in their cheek pouches and scatter it away from the hole, so the entrance looks clean and almost tidy.
Vole holes are smaller, usually under an inch and a half, and often connect to visible surface runways through the grass. Chipmunk holes tend to appear near vertical structures such as foundations, retaining walls, stumps, and stacked firewood, since chipmunks like a solid surface nearby for cover.
Step 1: Check Whether the Burrow Is Still Active
Filling an occupied burrow just means digging it out again, and sometimes trapping the animal underground unnecessarily. A quick way to check activity is to loosely stuff the hole with newspaper or lightly cover it with a thin layer of loose soil in the evening, then check it the next morning. If it’s been pushed open or cleared out, the burrow is active. If it’s untouched after two or three days, you’re likely dealing with an abandoned tunnel that’s safe to fill immediately.
Step 2: Deal With the Chipmunks Before You Fill Anything
If the burrow is active, filling it without addressing the chipmunk is a temporary fix at best. Start by removing what’s drawing them to that spot. Spilled birdseed, unsecured pet food, fallen fruit, and exposed compost are the most common attractants. Switching to a chipmunk-resistant feeder, storing food in sealed containers, and cleaning up debris piles near the burrow will reduce the appeal of that location significantly. Overgrown weeds along a fence line or foundation give chipmunks the same kind of cover they look for near woodpiles, so keeping that growth pulled back removes one more reason for them to settle in
For an established burrow, a live trap baited with peanut butter or sunflower seeds placed near the active entrance is usually the most reliable removal method. Check local regulations before relocating any trapped animal, since some states restrict where wildlife can be released. Once the burrow has been empty for several days with no new activity, it’s ready to be filled.
Step 3: Fill the Holes the Right Way
Once you’ve confirmed a burrow is empty, dig out the loose soil around the entrance slightly so you can pack the fill material tightly rather than just dropping it on top. A mix of soil and coarse gravel works well because the gravel makes it harder for the tunnel to be reopened from below. Used cat litter mixed into the fill adds a scent that chipmunks tend to avoid when reopening old burrows.
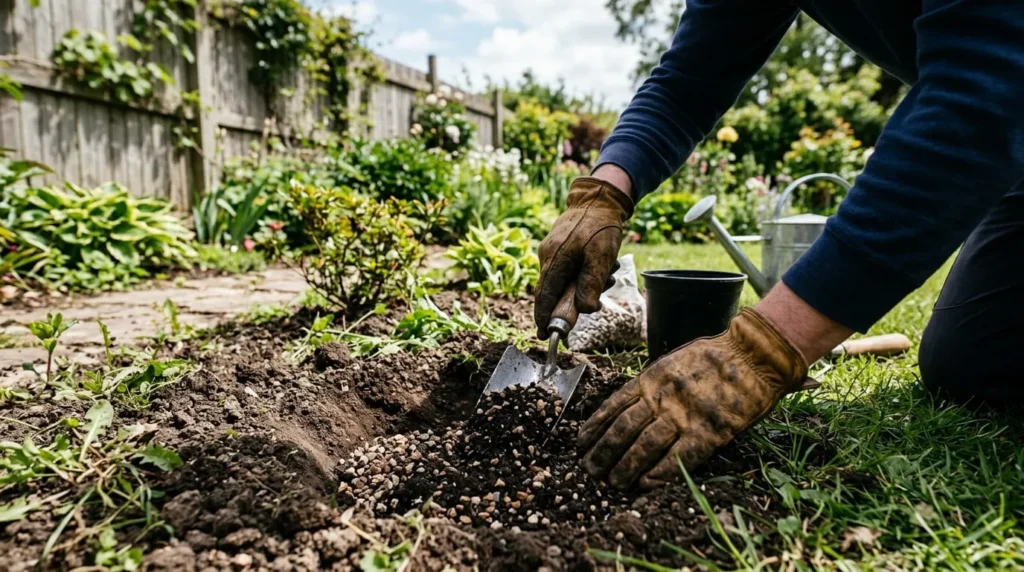
Pack the material down firmly in layers rather than filling the hole all at once. A loosely filled hole collapses or gets pushed out within days, which can look like the chipmunk returned even when it hasn’t. Tamp it with the back of a spade or your foot until the surface feels solid.
Step 4: Block the Area So New Tunnels Don’t Start
Filling holes without changing the surrounding conditions usually just moves the problem a few feet over. Along foundations, sheds, and retaining walls, burying an L-shaped footer of hardware cloth about six to twelve inches deep and angled outward stops chipmunks from tunneling underneath. The horizontal section of the L makes digging straight down at the wall much harder.
In garden beds where bulbs or root vegetables keep getting dug up, lining the bottom and sides of the planting area with quarter-inch hardware cloth protects the roots without harming the plants. For open lawn areas where holes tend to cluster, thinning out ground cover, trimming overgrown shrubs, and stacking firewood at least a foot off the ground removes the shelter chipmunks use to feel safe digging there.
Natural and Humane Deterrents That Help Keep Holes From Returning
A few low-effort additions can make a treated area less attractive to chipmunks without harming them. Planting daffodils, alliums, marigolds, or lavender around vulnerable beds works as a mild deterrent, since chipmunks generally avoid the scent of these plants. Predator scent granules, sold for use against rabbits and rodents, can be scattered around burrow sites to discourage chipmunks from reopening them.

Cayenne pepper mixed with water and sprayed around garden edges is a common home remedy, though it needs reapplication after rain to stay effective. Ultrasonic repellent devices are marketed for chipmunk control as well, but results are inconsistent, and they work better as one part of a combined approach than as a standalone fix.
Are Chipmunk Holes Actually Harmful to Your Yard
Opinions differ here, and it’s worth understanding both sides before deciding how much effort to put in. Wildlife organizations generally note that chipmunk burrows are too shallow and narrow to cause meaningful structural damage to a home’s foundation. Most of the visible impact is cosmetic: small holes in mulch beds, disturbed soil around plantings, or an occasional dug-up bulb.
That said, tunnels running directly under a walkway, patio slab, or the edge of a foundation can contribute to minor settling over time, especially in sandy or loose soil that erodes easily once a void forms underneath. The risk is usually limited to soil movement rather than damage to the structure itself. If you’re mainly concerned about appearance and the occasional plant loss, deterrents and burrow filling are enough. If holes are appearing directly beneath a walkway or slab, monitoring the area for settling is a reasonable precaution alongside the steps above.
When to Call a Wildlife Control Professional
Most chipmunk hole problems can be handled with the steps above, but a few situations call for outside help. If burrows have spread extensively under a foundation, deck, or driveway, or if chipmunks have moved into a crawl space, attic, or wall void, a licensed wildlife control operator can assess the extent of the tunnel network and remove the animals safely. Professionals also carry equipment for sealing larger access points that go beyond what hardware cloth and caulk can handle on their own.
For the average yard, though, identifying active burrows, removing what’s attracting the chipmunks, filling holes properly, and blocking key entry points will handle the problem without needing to bring in outside help. Keep an eye on filled holes for a week or two after treatment. If they stay closed and no new ones appear nearby, the burrow is gone for good.